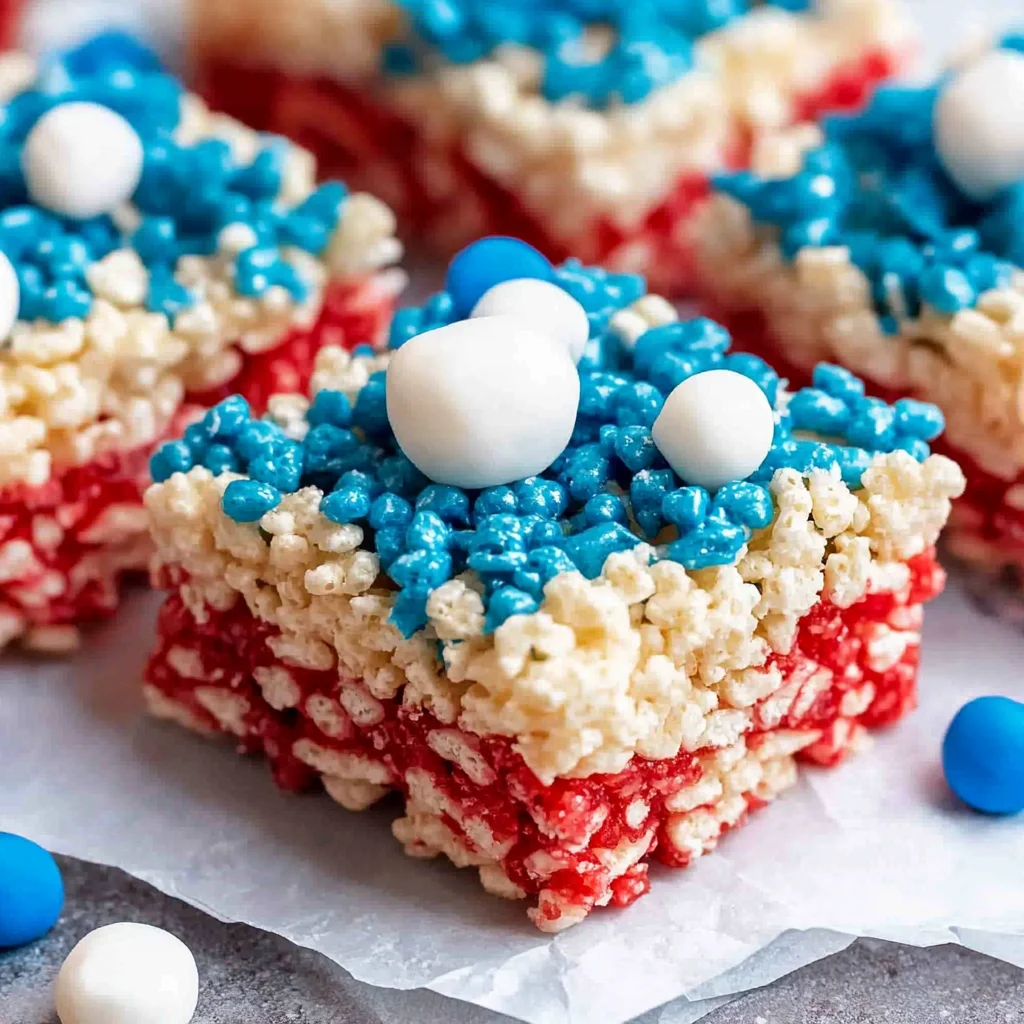
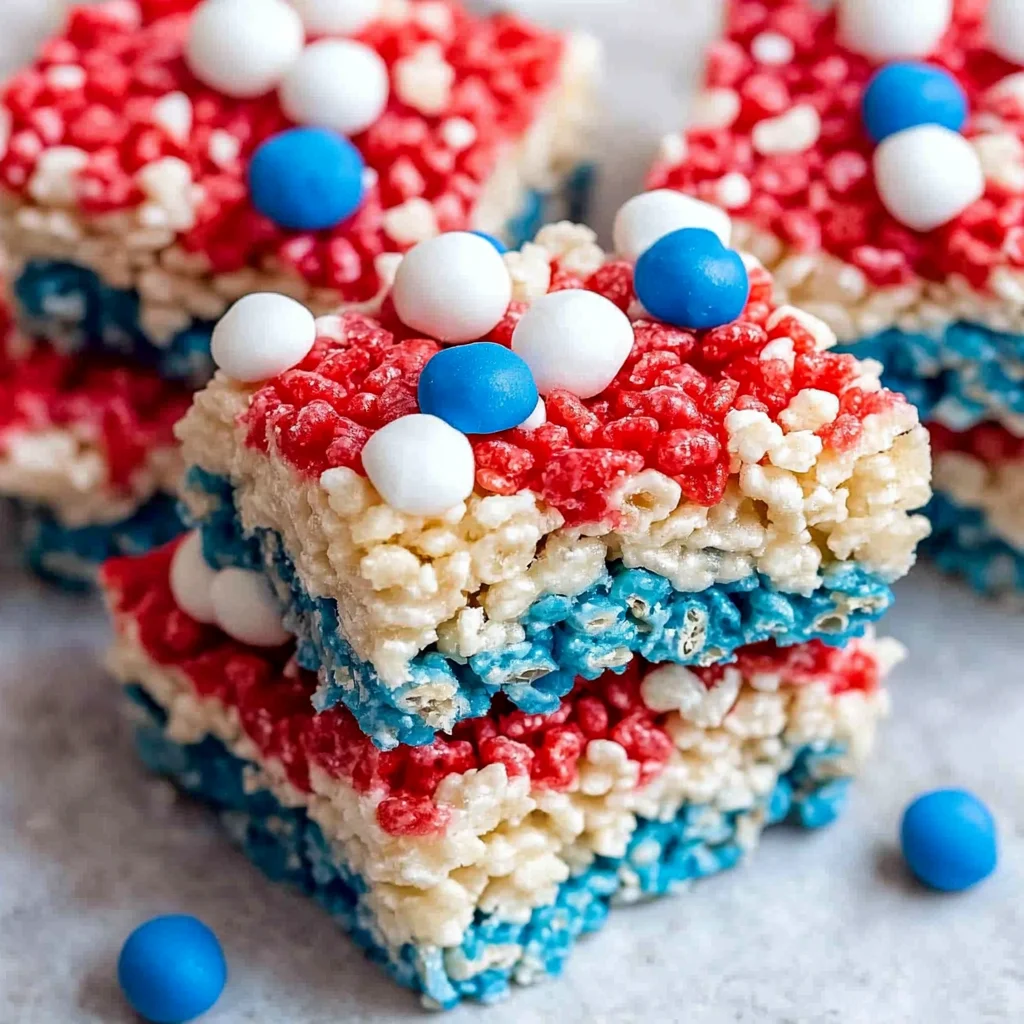
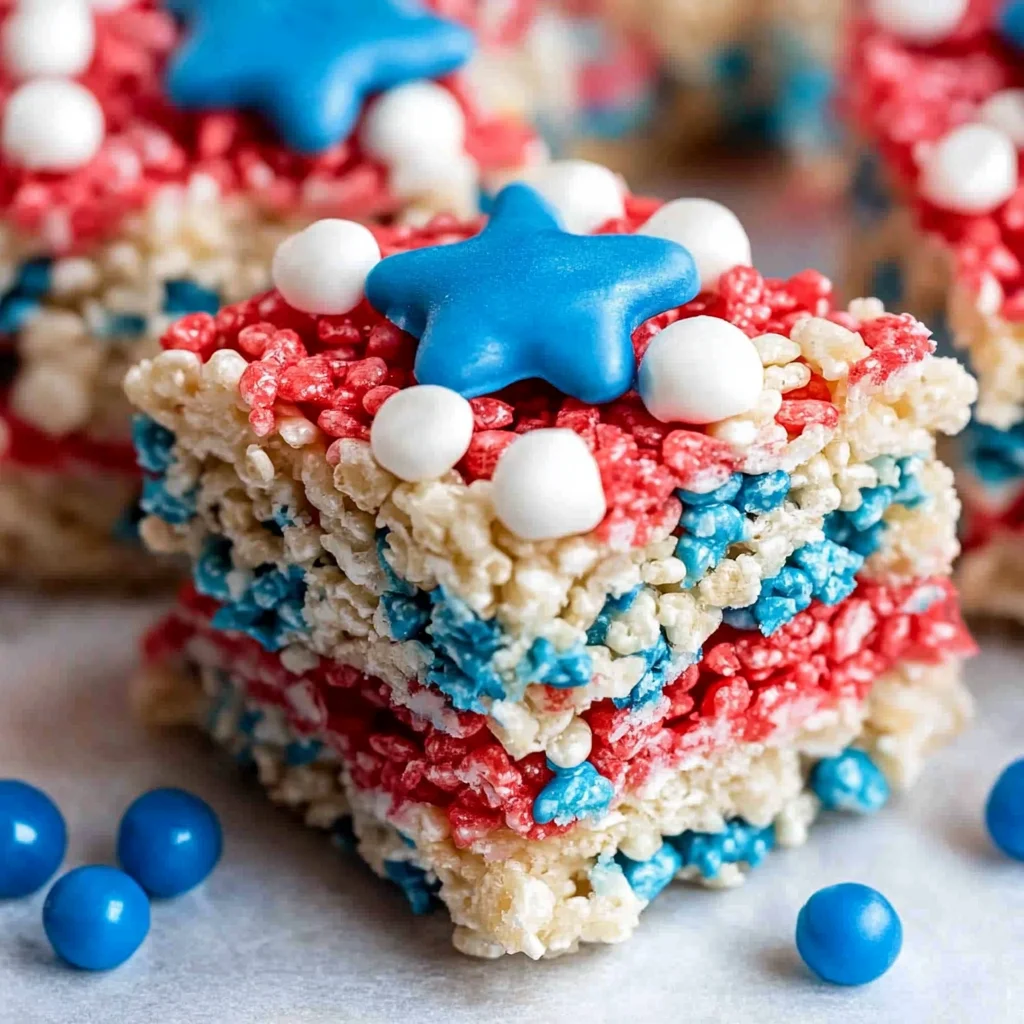
The Red, White, and Blue Rice Krispies Treats are a festive treat that perfectly celebrates any occasion. These treats are not only visually stunning but also incredibly easy to make. They combine the iconic flavor of Rice Krispies with colorful candy melts, making them perfect for holidays, parties, or simply as a fun snack. With their delightful crunch and vibrant colors, these treats will surely be a hit among kids and adults alike.
Why You’ll Love This Recipe
- Easy to Make: This recipe requires minimal ingredients and no baking, making it accessible for all skill levels.
- Festive Appeal: The bright colors of red, white, and blue make these treats perfect for celebrations like Independence Day or Memorial Day.
- Customizable Toppings: You can easily modify the decoration with different colored candy melts or sprinkles to suit your event.
- Perfect for Sharing: Each treat comes on a stick, making them convenient for parties and gatherings.
- Kid-Friendly Fun: Making these treats is a great activity to engage children in the kitchen!
Tools and Preparation
To create your Red, White, and Blue Rice Krispies Treats, you’ll need some essential tools to streamline the process.
Essential Tools and Equipment
- Large baking sheet
- Parchment paper
- Microwave-safe bowl
- Kitchen scissors
Importance of Each Tool
- Large baking sheet: Provides ample space for cooling your treats without sticking together.
- Parchment paper: Prevents sticking and makes cleanup easy after you finish decorating.
Ingredients
Ingredients:
– (2) 8-count packages of Kellogg’s Rice Krispie Treats
– 10 oz package of Wilton Royal Blue Candy Melts
– 10 oz package of Wilton Bright White Candy Melts
– 10 oz package of Wilton Red Candy Melts
– 16 popsicle OR lollipop sticks
– 2 small sandwich bags
– Kitchen scissors
For Garnish
- 2 tablespoons fresh parsley, finely chopped

How to Make Red, White, and Blue Rice Krispies Treats
Step 1: Prepare Your Baking Sheet
Find a large baking sheet and line it fully with parchment paper. This will prevent the treats from sticking.
Step 2: Prepare the Rice Krispies Treats
Open up all the Rice Krispies treats and take them out of their package. Insert popsicle sticks into the bottom of each treat.
Step 3: Chill the Treats
Lay the treats flat on the prepared baking sheet. Place them in the fridge for about 20 minutes to firm up.
Step 4: Melt the White Candy Melts
Pour the Wilton Bright White Candy Melts into a microwave-safe bowl. Heat in the microwave for 30 seconds at a time. Stir well after each heating until completely melted.
Step 5: Dip in White Chocolate
Once melted, remove your chilled treats from the fridge. Dip each treat into the melted white chocolate about three-quarters of the way down.
Step 6: Set Dipped Treats on Parchment Paper
Place each dipped treat back onto the parchment-lined baking sheet. Allow them to set briefly until firm.
Step 7: Prepare Colored Candy Melts
Scoop out half a cup each of red and blue candy melts into separate sandwich bags. Microwave each bag for about 30 seconds until melted.
Step 8: Decorate with Colors
Cut a small corner from each sandwich bag. Squeeze gently to drizzle melted chocolate over the treated snacks in fun patterns.
Step 9: Final Touches
Repeat this process until all treats are decorated as desired. Let them cool completely before serving.
Enjoy your deliciously festive Red, White, and Blue Rice Krispies Treats!
How to Serve Red, White, and Blue Rice Krispies Treats
Red, White, and Blue Rice Krispies Treats are not only delightful but also a feast for the eyes. These colorful treats are perfect for celebrating patriotic holidays or any festive occasion. Here are some creative serving suggestions to make your treats shine.
On a Decorative Platter
- Arrange the treats on a vibrant platter to enhance their colorful appeal.
- Add fresh fruit like strawberries and blueberries around the treats for a fresh touch.
Individually Wrapped
- Wrap each treat in clear cellophane and tie with a ribbon.
- This makes them perfect for party favors or gifts.
With Ice Cream
- Serve the treats alongside a scoop of vanilla or strawberry ice cream.
- The coolness of the ice cream complements the sweet crunchiness perfectly.
As Party Favors
- Place one treat in a small clear bag and attach a thank-you note.
- These make great take-home goodies for guests.
Stacked in a Jar
- Layer multiple treats in a mason jar for a fun display.
- This is ideal for table centerpieces or as gifts.
How to Perfect Red, White, and Blue Rice Krispies Treats
Perfecting your Red, White, and Blue Rice Krispies Treats can elevate them from good to great. Follow these tips to ensure your treats turn out beautifully every time.
- Use Fresh Ingredients: Ensure your Rice Krispies and candy melts are fresh to achieve optimal flavor and texture.
- Chill Properly: Letting the dipped treats chill in the fridge helps the chocolate set perfectly without melting.
- Microwave Carefully: Heat the candy melts in short intervals to prevent burning; stirring helps distribute heat evenly.
- Pattern Creativity: Experiment with different patterns when drizzling chocolate for a unique look on each treat.
- Size Consistency: Cut the treats into uniform sizes for even dipping and better presentation.
- Add Sprinkles: Before the chocolate sets, sprinkle some red, white, or blue sprinkles on top for added flair.
Best Side Dishes for Red, White, and Blue Rice Krispies Treats
Serving side dishes alongside your Red, White, and Blue Rice Krispies Treats can create a balanced dessert spread. Here are some suggestions that pair well with these festive treats.
- Fruit Salad: A mix of seasonal fruits adds freshness and balances sweetness.
- Mini Cheesecakes: Individual cheesecakes offer creamy contrast and can be flavored with fruit toppings.
- Chocolate-Dipped Strawberries: These add elegance and are easy to prepare—just dip fresh strawberries in melted chocolate!
- Patriotic Fruit Skewers: Alternate layers of strawberries, blueberries, and marshmallows on skewers for easy serving.
- Vanilla Cupcakes: Simple vanilla cupcakes topped with buttercream frosting complement the sweetness of the Rice Krispies Treats.
- S’mores Bar: Set up an interactive s’mores station with graham crackers, marshmallows, and chocolate for guests to enjoy!
Common Mistakes to Avoid
Making Red, White, and Blue Rice Krispies Treats can be simple, but there are common pitfalls to watch out for.
- Using the wrong chocolate melts: Make sure to select the right colors for your celebration. Using different brands may result in inconsistent melting or taste.
- Overheating the candy melts: Heat them in short bursts of 30 seconds and stir in between. Overheating can cause them to seize up and become unusable.
- Not cooling the treats properly: Allowing the treats to cool in the fridge is essential for setting the chocolate. Skipping this step can result in messy dipping.
- Pouring too much chocolate: When decorating with melted candy melts, squeeze gently. Pouring too much can make your treats look clumpy instead of neat and festive.
- Ignoring serving size: Each treat is meant to serve one. Cutting them too large might lead to overeating and waste; stick to the suggested serving size for best enjoyment.
Refrigerator Storage
- Store your Red, White, and Blue Rice Krispies Treats in an airtight container.
- They will last up to 1 week in the refrigerator.
- Make sure they are fully cooled before sealing them to avoid moisture buildup.
Freezing Red, White, and Blue Rice Krispies Treats
- Wrap each treat individually in plastic wrap before placing them in a freezer-safe bag.
- They can be frozen for up to 3 months.
- To maintain quality, try to remove as much air as possible from the storage bag.
Reheating Red, White, and Blue Rice Krispies Treats
- Oven: Preheat your oven to 250°F (120°C) and place treats on a baking sheet for about 5 minutes. This will warm them without making them hard.
- Microwave: Use a microwave-safe plate and heat for about 10-15 seconds. Check regularly to avoid overheating.
- Stovetop: Place treats in a pan over low heat while stirring gently until warmed through.
Frequently Asked Questions
What are Red, White, and Blue Rice Krispies Treats?
These treats are a festive dessert made with Rice Krispies cereal and colored candy melts that represent patriotic colors—perfect for holidays like Independence Day.
Can I customize my Red, White, and Blue Rice Krispies Treats?
Absolutely! You can mix in sprinkles or substitute different colored candy melts based on any holiday theme.
How do I store my Red, White, and Blue Rice Krispies Treats?
Store them in an airtight container at room temperature or refrigerate them if you want to keep them fresh longer.
How long does it take to prepare Red, White, and Blue Rice Krispies Treats?
The total time is about 45 minutes including preparation and cooling time.
Final Thoughts
These Red, White, and Blue Rice Krispies Treats are not only visually stunning but also easy to make for any occasion. They’re perfect for parties or family gatherings. Feel free to customize your toppings or colors based on your event theme! Enjoy creating these delightful treats!

Red, White, and Blue Rice Krispies Treats
- Total Time: 35 minutes
- Yield: Approximately 16 servings 1x
Description
Celebrate your favorite occasions with these vibrant Red, White, and Blue Rice Krispies Treats! Perfect for Independence Day, Memorial Day, or any festive gathering, these delicious snacks are a breeze to make. Combining classic Rice Krispies with colorful candy melts, each treat offers a delightful crunch and bright appeal that will please both kids and adults alike. Easy to customize with various toppings, they can be served on sticks for convenient sharing at parties. Get ready to impress your guests with this fun and festive treat!
Ingredients
- 2 packages (8-count) Kellogg's Rice Krispie Treats
- 10 oz Wilton Royal Blue Candy Melts
- 10 oz Wilton Bright White Candy Melts
- 10 oz Wilton Red Candy Melts
- 16 popsicle or lollipop sticks
Instructions
- Line a large baking sheet with parchment paper.
- Unwrap the Rice Krispies Treats and insert a popsicle stick into each one.
- Chill the treats in the fridge for about 20 minutes.
- Melt the Bright White Candy Melts in a microwave-safe bowl in 30-second intervals until smooth.
- Dip each chilled treat into the melted white chocolate about three-quarters of the way down.
- Place dipped treats back onto the parchment-lined baking sheet to set.
- Melt half a cup of red and blue candy melts in separate sandwich bags for easy decorating.
- Cut corners from bags and drizzle over treats in fun patterns.
- Let cool completely before serving.
- Prep Time: 25 minutes
- Cook Time: 10 minutes
- Category: Dessert
- Method: No-bake
- Cuisine: American
Nutrition
- Serving Size: 1 serving
- Calories: 150
- Sugar: 10g
- Sodium: 110mg
- Fat: 5g
- Saturated Fat: 3g
- Unsaturated Fat: 2g
- Trans Fat: 0g
- Carbohydrates: 27g
- Fiber: 0g
- Protein: 1g
- Cholesterol: 0mg
Keywords: Feel free to add sprinkles before the melted chocolate sets for extra flair. For variations, substitute different colored candy melts based on your event theme.