There’s a delightful aroma wafting through your kitchen, a symphony of chocolate and sweetness that could make even the staunchest dessert skeptic weak in the knees. Imagine a mouse cake, its delicate layers whispering promises of rich flavor and fluffy texture, just waiting to dance on your taste buds. This isn’t just any cake; it’s a whimsical creation that could make even the grumpiest of mice smile with glee.
If you’re reminiscing about birthday parties or cozy family gatherings, this cake has been the star of many such events. It effortlessly brings joy to any occasion, whether it’s a child’s birthday bash or a sophisticated tea party. With every bite, you can expect a delightful balance of sweetness and a hint of cocoa that will have you dreaming about second helpings long after the last slice is gone.
Why You'll Love This Recipe
- This mouse cake is surprisingly easy to make, so you won’t need to be a pastry chef to impress your friends and family.
- Its rich chocolate flavor paired with light textures creates an irresistible dessert that looks as good as it tastes.
- The adorable mouse theme makes it perfect for kids’ parties or any whimsical gathering.
- Plus, you can easily customize it by adding your favorite fillings or toppings!
Ingredients for Mouse cake
Here’s what you’ll need to make this delicious dish:
- All-Purpose Flour: This forms the base of your cake and gives it structure. Opt for unbleached flour for a more wholesome taste.
- Cocoa Powder: Unsweetened cocoa powder adds that rich chocolate flavor we all crave. Make sure it’s fresh for best results.
- Baking Powder: This leavening agent helps your cake rise beautifully, making it light and airy.
- Sugar: Granulated sugar sweetens the deal and contributes to the lovely texture of the cake.
- Unsalted Butter: Softened butter adds richness and moisture to your cake. Be sure to let it sit out before mixing!
- Eggs: They bind everything together while adding moisture and richness. Room temperature eggs work best here.
- Milk: Use whole milk for creaminess or substitute with plant-based options like almond or oat milk.
- Vanilla Extract: A splash of vanilla enhances all the flavors in this delightful dessert.
For Decoration:
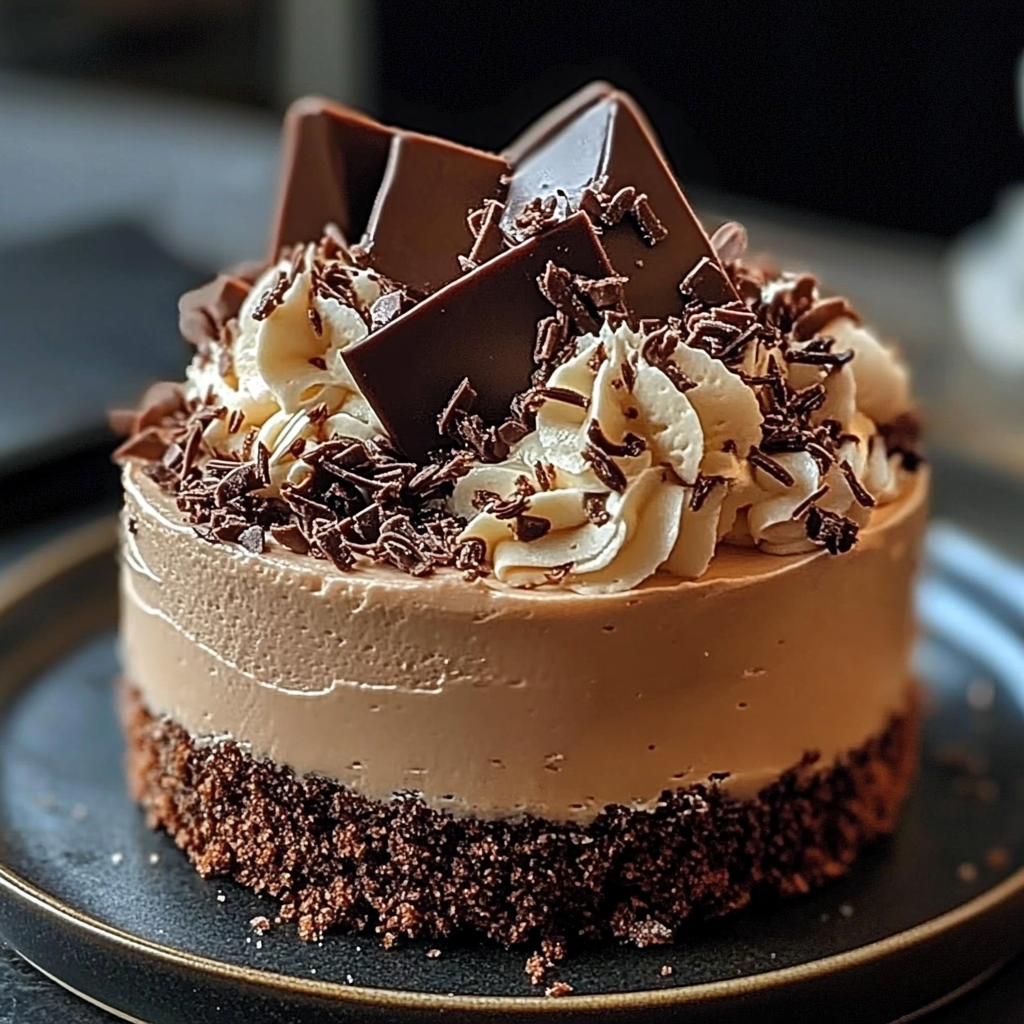
- Chocolate Ganache: Made from heavy cream and chocolate chips, this glossy topping is essential for that luxurious finish.
- Fresh Berries: Add some colorful fruit on top for a pop of freshness and visual appeal.
The full ingredients list, including measurements, is provided in the recipe card directly below.

How to Make Mouse cake
Follow these simple steps to prepare this delicious dish:
Step 1: Preheat Your Oven
Preheat your oven to 350°F (175°C). Grease two round cake pans with nonstick spray and line with parchment paper for easy removal later.
Step 2: Mix Dry Ingredients
In a large bowl, whisk together flour, cocoa powder, baking powder, and sugar until well combined. This will ensure an even distribution of ingredients throughout your cake.
Step 3: Cream Butter and Sugar
In another bowl, beat softened butter until creamy. Gradually add in sugar while continuing to mix until light and fluffy—a process that takes about three minutes.
Step 4: Add Eggs and Milk
Crack in those eggs one at a time while mixing continuously. Then pour in the milk and vanilla extract until fully incorporated into your buttery mixture.
Step 5: Combine Wet and Dry Mixtures
Gradually add the dry ingredients into the wet mixture while stirring gently. Be careful not to overmix—just combine until you see no more flour streaks!
Step 6: Bake
Divide the batter evenly between your prepared pans and bake for about 25-30 minutes or until a toothpick inserted into the center comes out clean. Let cool completely before removing from pans.
Now that you’ve conquered making this adorable mouse cake, remember to frost it with luscious chocolate ganache once cooled! Decorate it with fresh berries if you’re feeling fancy—because who doesn’t want their dessert looking like it came straight out of Pinterest? Transfer slices onto plates for serving where everyone will marvel at both its cuteness and scrumptiousness!
You Must Know
- This delightful mouse cake is not just a treat for your taste buds; it’s a feast for your eyes too.
- With its whimsical design and rich flavors, this cake is perfect for parties or just a fun family dessert night.
- You can easily customize it based on personal preferences, making it as unique as your imagination.
Perfecting the Cooking Process
Start by preparing the cake batter first so it can cool while you whip up the frosting. Bake the cake layers and let them rest before assembling. This ensures a moist and flavorful mouse cake that stands tall and proud.
Add Your Touch
Feel free to swap ingredients according to your cravings! Use different flavored extracts, add nuts or chocolate chips to the batter, or top with fresh fruit or sprinkles for extra flair. Your creativity knows no bounds!
Storing & Reheating
Store any leftover mouse cake in an airtight container in the fridge for up to three days. If you need to reheat, warm individual slices in the microwave for about 10-15 seconds—just enough to soften the frosting without melting it away.
Chef's Helpful Tips
- To achieve that perfect fluffy texture, make sure your butter is at room temperature before mixing.
- Avoid overmixing the batter; it can lead to a dense cake.
- Always let your cakes cool completely before frosting for a smooth finish.
Sometimes I look back at the first time I made this mouse cake, only to be met with laughter from my friends who couldn’t believe how cute and delicious it turned out! It became an instant hit at gatherings!
FAQs:
What is a Mouse Cake?
A Mouse Cake is a delightful dessert that resembles a cute mouse. It typically features a moist cake base, often flavored with vanilla or chocolate. The cake is decorated to look like a mouse, usually with frosting for ears, eyes, and whiskers. This whimsical treat can be made using various ingredients and can cater to different dietary needs by substituting conventional components with alternatives, ensuring everyone can enjoy it.
How do I decorate a Mouse Cake?
To decorate a Mouse Cake, start by covering the entire cake in a smooth layer of frosting. Use fondant or colored buttercream to create features like ears and eyes. You can use chocolate chips or candy for eyes and edible glitter for extra sparkle. Feel free to get creative! The goal is to make it look adorable while maintaining the delicious flavor of the cake underneath.
Can I use alternative sweeteners in my Mouse Cake?
Yes! You can certainly use alternative sweeteners in your Mouse Cake recipe. Options like stevia, agave syrup, or coconut sugar work well as substitutes for granulated sugar. Make sure to adjust the quantity according to the sweetness level of the chosen sweetener. This keeps your dessert enjoyable without compromising on taste or texture.
How long does a Mouse Cake stay fresh?
A Mouse Cake can stay fresh for about 3-5 days when stored properly. Keep it covered in an airtight container at room temperature if you plan to eat it within this timeframe. If you need to store it longer, consider refrigerating it, but be aware that refrigeration may affect the texture of certain frostings.
Conclusion for Mouse Cake:
In summary, making a Mouse Cake is not only fun but also allows for creativity in both flavor and decoration. By using appropriate substitutes for traditional ingredients, everyone can enjoy this whimsical dessert without compromise. Whether for a birthday party or an afternoon treat, this cake will undoubtedly bring smiles all around. Enjoy the process of baking and decorating your own unique Mouse Cake!

Mouse Cake
- Total Time: 50 minutes
- Yield: Serves approximately 8 people 1x
Description
Indulge in the whimsical delight of a Mouse Cake, a charming dessert that combines rich chocolate flavors with a light, fluffy texture. Perfect for birthday parties or family gatherings, this cake not only pleases the palate but also captivates the eye with its adorable mouse design. Easy to make and customize, it’s bound to be a showstopper at any event!
Ingredients
- 1 ½ cups all-purpose flour
- 1 cup unsweetened cocoa powder
- 2 tsp baking powder
- 1 cup granulated sugar
- ½ cup unsalted butter (softened)
- 3 large eggs (room temperature)
- ½ cup whole milk
- 2 tsp vanilla extract
Instructions
- Preheat your oven to 350°F (175°C). Grease two round cake pans and line them with parchment paper.
- In a bowl, whisk together flour, cocoa powder, baking powder, and sugar until combined.
- In another bowl, beat the softened butter until creamy. Gradually add sugar and mix until light and fluffy.
- Add eggs one at a time while mixing, then pour in milk and vanilla extract.
- Gradually combine wet and dry mixtures until just incorporated.
- Divide batter between prepared pans and bake for 25-30 minutes or until a toothpick comes out clean.
- Prep Time: 20 minutes
- Cook Time: 30 minutes
- Category: Dessert
- Method: Baking
- Cuisine: American
Nutrition
- Serving Size: 1 slice (100g)
- Calories: 350
- Sugar: 28g
- Sodium: 180mg
- Fat: 15g
- Saturated Fat: 9g
- Unsaturated Fat: 5g
- Trans Fat: 0g
- Carbohydrates: 47g
- Fiber: 3g
- Protein: 6g
- Cholesterol: 70mg
Keywords: For added flavor, consider incorporating chocolate chips or nuts into the batter. Decorate with chocolate ganache and fresh berries for a stunning finish. Store leftovers in an airtight container in the fridge for up to three days.