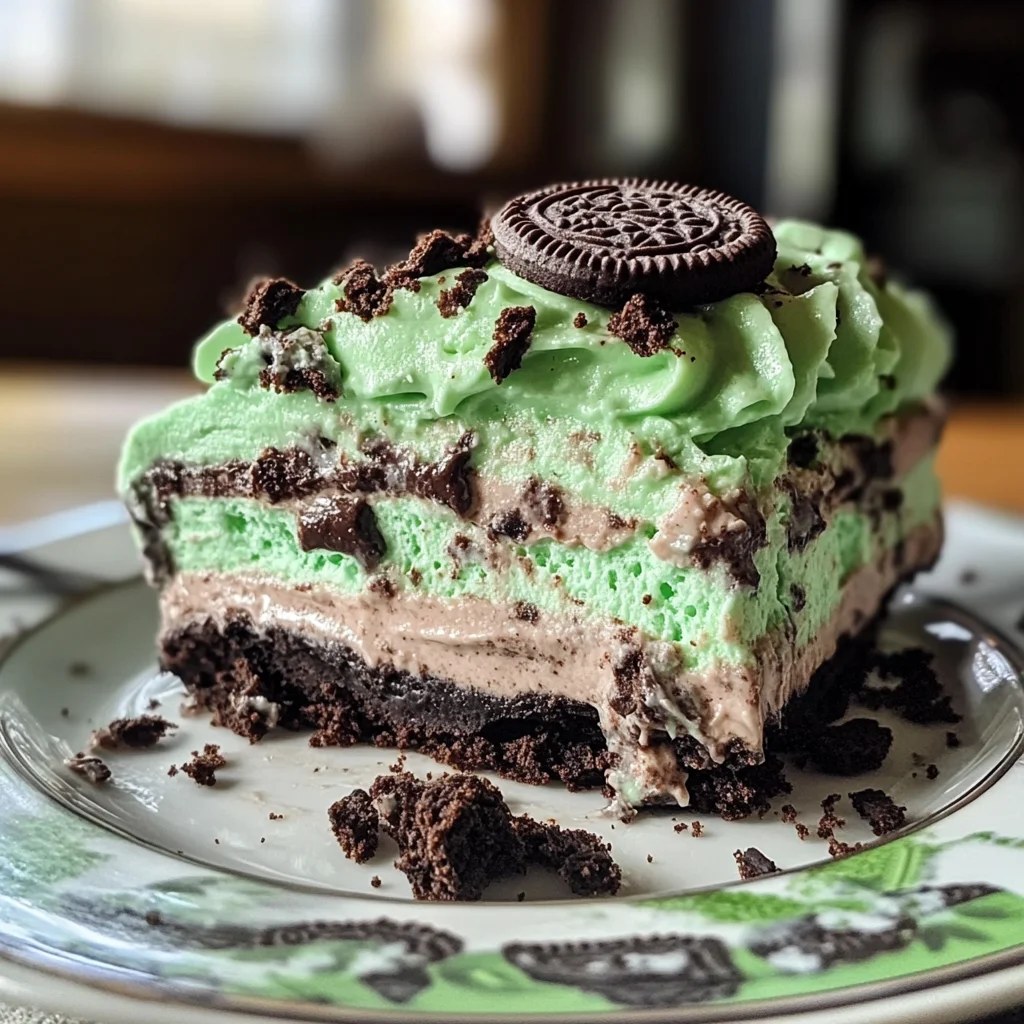
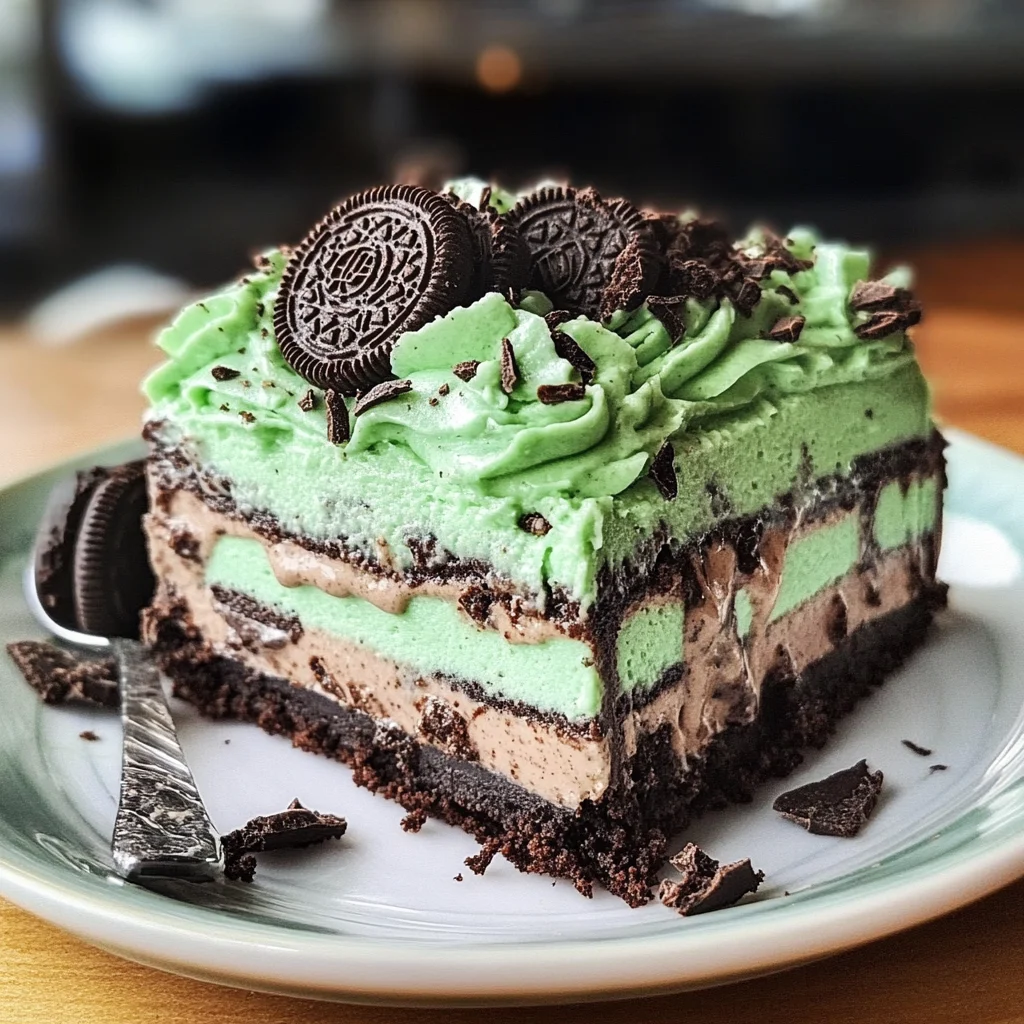
This Heavenly Mint OREO Dessert is a delightful treat that brings joy to any occasion! Its rich layers of chocolate and mint flavors, combined with a creamy texture, make it irresistible. This no-bake pie is perfect for birthdays, holidays, or simply satisfying your sweet tooth on a warm day. Once you try it, you’ll understand why it’s become a favorite!
Why You’ll Love This Recipe
- No-Bake Convenience: This dessert requires no baking, making it easy for anyone to whip up in just 20 minutes.
- Decadent Flavor: The combination of chocolate and mint creates a heavenly taste that will leave everyone wanting more.
- Customizable Layers: Feel free to mix and match layers or add your favorite toppings for a personal touch.
- Perfect for Gatherings: It serves up to eight people, making it an excellent choice for parties or family gatherings.
- Kid-Friendly Fun: Kids love helping out with this recipe, especially when it comes to crushing the cookies!
Tools and Preparation
Gathering the right tools will make your dessert-making experience smooth and enjoyable. Here are the essentials you need:
Essential Tools and Equipment
- Mixing bowls
- Electric mixer
- Large zipper bag
- Rolling pin
- 9×11 baking dish
- Spatula
Importance of Each Tool
- Mixing bowls: A variety of sizes helps keep your ingredients organized while mixing different components.
- Electric mixer: This tool makes blending cream cheese and sugar effortless, ensuring a smooth texture without lumps.
- Rolling pin: Perfect for crushing Oreos quickly and evenly—no mess!
- Spatula: An essential tool for spreading layers evenly in the baking dish.

Ingredients
This Heavenly Mint OREO Dessert is so decadent and fun to make–it’s a no-bake pie that you just have to taste to understand my obsession.
For the Chocolate Layer
- 2 small packages instant chocolate pudding
- 3 ¼ Cup(s) milk
For the Cream Cheese Layer
- 1 8-ounce package cream cheese (room temperature)
- 1 Cup(s) powdered sugar
- 2 8-ounce containers whipped topping
For the Crust and Topping
- 1 package mint Oreos
- ½ Cup(s) butter (melted)
- Green food coloring
How to Make Heavenly Mint OREO Dessert
Step 1: Prepare the Chocolate Pudding
Whisk together instant chocolate pudding and milk in a large bowl until set.
Step 2: Make the Cream Cheese Mixture
In a second bowl, cream together the cream cheese and powdered sugar with an electric mixer until smooth.
Step 3: Fold in Whipped Topping
Fold in one tub of whipped topping and green food coloring into the cream cheese mixture. Stir well and set aside.
Step 4: Crush the Oreos
Place mint Oreo cookies into a large zipper bag. Use a rolling pin to crush them into fine pieces.
Step 5: Create the Cookie Crust
Add half of the crushed Oreos to the bottom of a 9×11 baking dish. Pour melted butter evenly over the crushed cookies and stir to combine. Press this mixture firmly into the bottom of the pan.
Step 6: Layer Cream Cheese Mixture
Cover the crushed cookie crust with the cream cheese mixture, spreading it evenly over the cookies.
Step 7: Add Chocolate Pudding Layer
Spread chocolate pudding evenly over the cream cheese layer.
Step 8: Top with Green Whipped Topping
In a medium bowl, mix green food coloring with the second container of whipped topping. Spread this green layer evenly over the pudding layer.
Step 9: Finish with Crushed Oreos
Sprinkle remaining crushed Oreos on top for added crunch.
Step 10: Chill Before Serving
Place in the refrigerator and chill for at least two hours before enjoying your Heavenly Mint OREO Dessert!
How to Serve Heavenly Mint OREO Dessert
This Heavenly Mint OREO Dessert is not just a treat; it’s an experience. Whether you’re hosting a gathering or enjoying a quiet evening, here are some delightful ways to serve this dessert.
Individual Servings
- Use small glass cups to layer the dessert for individual servings. This adds a touch of elegance and makes it easy for guests to enjoy.
Family-Style Platter
- Serve the dessert in the original baking dish for a casual family-style serving. Just cut into squares and let everyone help themselves!
With Fresh Berries
- Add a handful of fresh berries on the side for a burst of color and freshness. Strawberries or raspberries pair beautifully with mint flavors.
Garnished with Chocolate Shavings
- Top each slice with chocolate shavings for an extra touch of decadence. It enhances the chocolate flavor and looks appealing.
Drizzled with Chocolate Syrup
- A drizzle of chocolate syrup over the top can take this dessert to the next level. It adds richness and an eye-catching finish.
How to Perfect Heavenly Mint OREO Dessert
Perfecting your Heavenly Mint OREO Dessert is all about attention to detail. Here are some tips to ensure you achieve dessert perfection every time.
- Chill Thoroughly: Allow the dessert to chill for at least two hours. This helps all layers set properly and enhances flavor blending.
- Use Room Temperature Ingredients: Make sure your cream cheese is at room temperature for easy mixing. This creates a smoother filling without lumps.
- Crush Oreos Properly: Crush the Oreos into fine pieces for an even crust. Avoid large chunks that can affect texture.
- Adjust Green Color: Add green food coloring gradually until you reach your desired shade. This way, you control the intensity of the color.
- Layer Carefully: Spread each layer evenly to create distinct layers that look beautiful when sliced. Take your time during assembly.
Best Side Dishes for Heavenly Mint OREO Dessert
Pairing side dishes with your Heavenly Mint OREO Dessert can enhance your dining experience. Here are some great options:
- Fresh Fruit Salad: A mix of seasonal fruits provides refreshing contrast and balances the richness of the dessert.
- Chocolate Mousse: Light and airy, this mousse complements the minty dessert while adding an extra touch of indulgence.
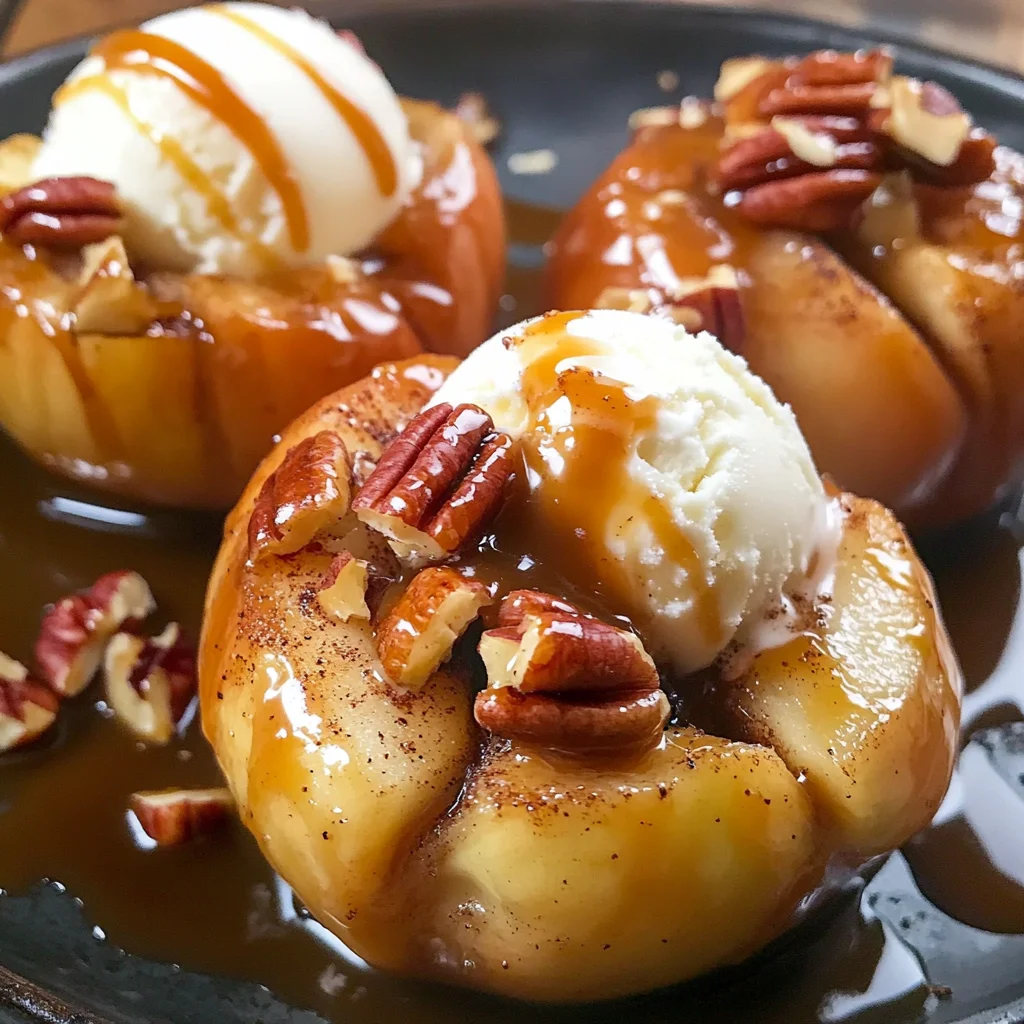
- Vanilla Ice Cream: A scoop of vanilla ice cream alongside offers a creamy contrast that pairs wonderfully with mint flavors.
- Coffee or Tea: Serving coffee or tea can help cleanse the palate after this rich dessert, making it ideal for after-dinner enjoyment.
- Nutty Biscotti: Crunchy biscotti adds texture and pairs well with both coffee and tea, enhancing your dessert experience.
- Caramel Sauce: A drizzle of caramel sauce can add sweetness and richness when served alongside each slice of mint Oreo dessert.
- Lemon Sorbet: The tartness of lemon sorbet provides a refreshing balance against the sweet layers of chocolate and mint.
- Cheese Plate: A selection of soft cheeses offers a unique savory element that contrasts nicely with sweet desserts like this one.
Common Mistakes to Avoid
Making the Heavenly Mint OREO Dessert can be fun, but there are a few common mistakes to watch out for.
- Incorrect measurement of ingredients: Always measure your ingredients accurately. Too much or too little of any ingredient can affect the dessert’s texture and flavor.
- Skipping the chilling time: Don’t rush this step! Chilling for at least two hours allows the flavors to meld and the dessert to set properly.
- Overmixing the cream cheese mixture: Mix until just combined. Overmixing can lead to a grainy texture instead of a smooth one.
- Not crushing Oreos finely enough: Ensure you crush the Oreos into smaller pieces. Larger chunks may not blend well with other layers and can make slicing difficult.
- Using cold cream cheese: Always let your cream cheese soften to room temperature. Cold cream cheese will not blend smoothly with the sugar.
Storage & Reheating Instructions
Refrigerator Storage
- Store leftovers in an airtight container for up to 3 days in the refrigerator.
- Keep it covered to maintain freshness and prevent odors from other foods.
Freezing Heavenly Mint OREO Dessert
- You can freeze this dessert for up to 2 months.
- Wrap it tightly in plastic wrap followed by aluminum foil to prevent freezer burn.
Reheating Heavenly Mint OREO Dessert
- Oven: Not recommended as it is best served chilled.
- Microwave: Use short intervals (10-15 seconds) if you want to slightly soften it, but avoid overheating.
- Stovetop: Not applicable for this dessert.
Frequently Asked Questions
Here are some common questions about making Heavenly Mint OREO Dessert.
What is Heavenly Mint OREO Dessert?
Heavenly Mint OREO Dessert is a no-bake pie that combines layers of chocolate pudding, cream cheese, and crushed mint Oreo cookies for a delightful treat.
Can I customize my Heavenly Mint OREO Dessert?
Yes! You can add different flavors of pudding or mix in additional toppings like crushed candy or fresh mint leaves for added flavor.
How long does it take to make Heavenly Mint OREO Dessert?
The preparation time is about 20 minutes, but remember to chill it for at least 2 hours before serving.
Can I use low-fat ingredients in this recipe?
Absolutely! You can substitute low-fat milk, light cream cheese, and reduced-calorie whipped topping without compromising too much on taste.
Final Thoughts
This Heavenly Mint OREO Dessert is not only easy to make but also incredibly delicious! Its creamy layers and chocolate crunch make it a perfect indulgence for any occasion. Feel free to customize it by adding your favorite toppings or altering the flavors. Give it a try; you won’t be disappointed!

Heavenly Mint OREO Dessert
- Total Time: 20 minutes
- Yield: Serves 8 people 1x
Description
Indulge in the Heavenly Mint OREO Dessert, a no-bake treat that perfectly combines creamy layers of chocolate and mint flavor with a delightful crunch. This dessert is ideal for gatherings, birthdays, or simply satisfying a sweet craving on a warm day. The rich, decadent taste and smooth texture make it an irresistible choice for both adults and kids alike. With its customizable layers, everyone can enjoy a personal twist on this classic dessert.
Ingredients
- 2 small packages instant chocolate pudding
- 3 ¼ Cup(s) milk
- 1 8-ounce package cream cheese (room temperature)
- 1 Cup(s) powdered sugar
- 2 8-ounce containers whipped topping
- 1 package mint Oreos
- ½ Cup(s) butter (melted)
- Green food coloring
Instructions
- In a large bowl, whisk together instant chocolate pudding and milk until set.
- In another bowl, beat cream cheese and powdered sugar with an electric mixer until smooth.
- Fold in one tub of whipped topping and add green food coloring; mix well and set aside.
- Crush mint Oreos in a large zipper bag using a rolling pin.
- Combine half of the crushed Oreos with melted butter; press into the bottom of a 9×11 baking dish.
- Spread the cream cheese mixture over the crust evenly.
- Layer chocolate pudding on top of the cream cheese layer.
- Mix green food coloring with the remaining whipped topping; spread it over the pudding layer.
- Sprinkle remaining crushed Oreos on top.
- Chill in the refrigerator for at least two hours before serving.
- Prep Time: 20 minutes
- Cook Time: 0 minutes
- Category: Dessert
- Method: No-Bake
- Cuisine: American
Nutrition
- Serving Size: 1 slice (100g)
- Calories: 320
- Sugar: 24g
- Sodium: 180mg
- Fat: 19g
- Saturated Fat: 10g
- Unsaturated Fat: 8g
- Trans Fat: 0g
- Carbohydrates: 34g
- Fiber: 1g
- Protein: 4g
- Cholesterol: 30mg
Keywords: For added flavor, consider mixing in chopped fresh mint or using different flavored whipped toppings. If you want extra crunch, try adding chopped nuts or drizzling with chocolate syrup before serving.