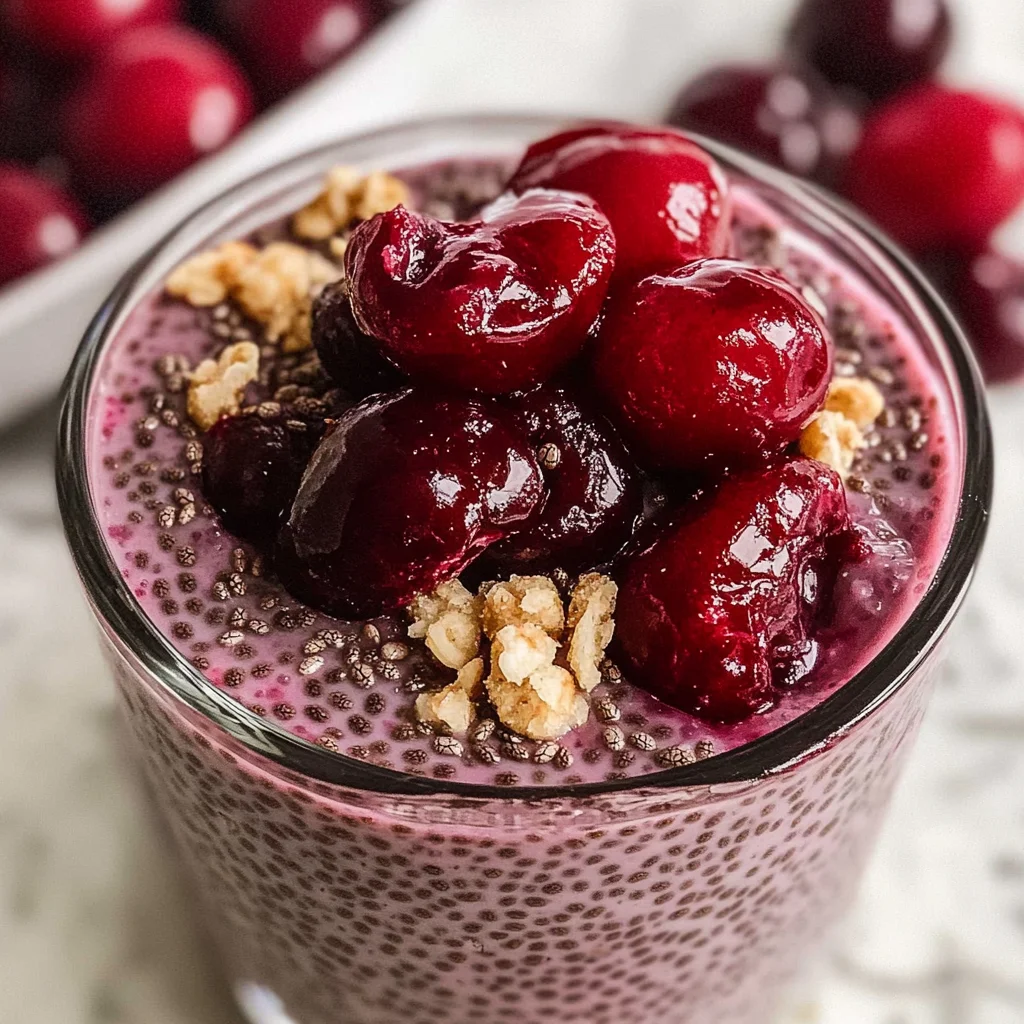
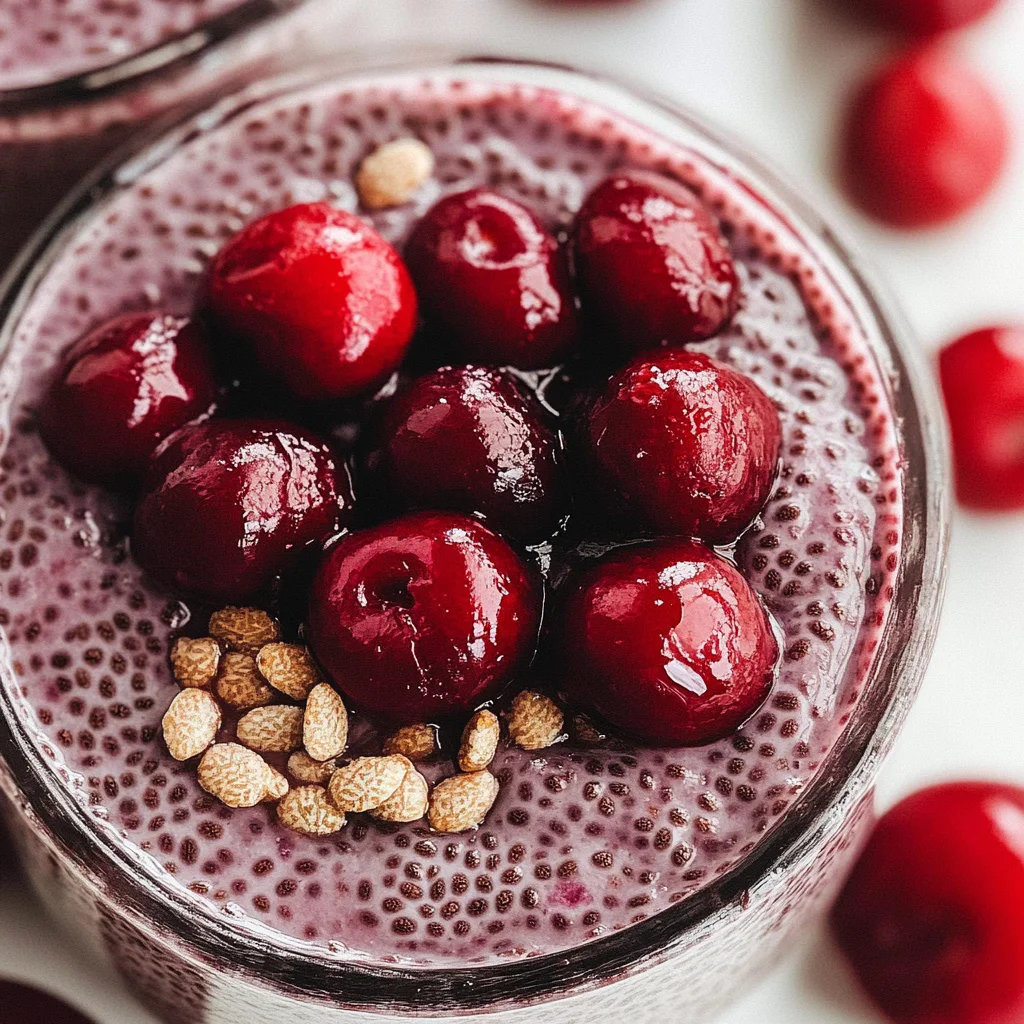
A Cherry Chia Pudding is not just a simple breakfast; it’s a delightful way to kickstart your day with flavor and nutrition. This creamy, vegan treat combines the sweetness of cherries with the health benefits of chia seeds, making it perfect for any occasion—from a quick morning meal to a refreshing snack. Enjoy this pudding as a versatile base for toppings or simply savor it on its own!
Why You’ll Love This Recipe
- Quick and Easy: With minimal prep time, you can whip up this delicious pudding in no time.
- Nutrient-Rich: Packed with fiber and antioxidants, this pudding is a healthy choice to fuel your morning.
- Customizable Flavors: Adjust sweetness or add your favorite toppings to make it uniquely yours.
- Vegan-Friendly: Made without dairy or animal products, it’s suitable for various dietary preferences.
- Make Ahead: Perfect for meal prep, you can enjoy it throughout the week.
Tools and Preparation
To create the perfect Cherry Chia Pudding, having the right tools makes all the difference. Below are some essentials that will help streamline your process.
Essential Tools and Equipment
- Blender
- Jar or container
- Spoon
Importance of Each Tool
- Blender: Essential for creating a smooth cherry milk mixture that forms the base of your pudding.
- Jar or Container: Ideal for storing your chia pudding in the fridge, allowing it to set overnight.
- Spoon: Useful for stirring and serving your delicious pudding after it has thickened.

Ingredients
For this delightful Cherry Chia Pudding, gather these ingredients:
For the Cherry Base
- 1/2 cup (70 g) frozen cherries
- 1/2 cup (125 ml) dairy-free milk
- 2 teaspoons maple syrup, or to taste
- 1/8 teaspoon almond extract, or to taste
For the Pudding
- 3 tablespoons (30 g) whole chia seeds
How to Make Cherry Chia Pudding
Step 1: Blend the Cherry Mixture
To start, add the frozen cherries, dairy-free milk, maple syrup, and almond extract to a blender. Blend until smooth. A small personal blender works best for single-serving portions.
Step 2: Combine with Chia Seeds
Next, pour the cherry milk into a jar or container. Stir in the whole chia seeds until well combined.
Step 3: Let It Sit
Allow the chia pudding to sit for about 10 minutes. This step helps separate any clumps that may form.
Step 4: Refrigerate Overnight
Cover the jar and refrigerate overnight. Some brands of chia seeds may take longer to thicken, so giving it overnight ensures perfect consistency.
Step 5: Final Touches Before Serving
Before enjoying your Cherry Chia Pudding, give it a good stir. If you prefer more sweetness, feel free to add additional maple syrup. Top with fruits or nuts if desired!
Enjoy this vibrant and nutritious Cherry Chia Pudding as part of your healthy breakfast routine!
How to Serve Cherry Chia Pudding
Cherry chia pudding is a versatile dish that can be enjoyed in many ways. Whether you prefer it as a simple breakfast or a delightful dessert, there are plenty of options to elevate your cherry chia pudding experience.
Fresh Fruits
- Berries: Add fresh blueberries, strawberries, or raspberries for extra flavor and nutrients.
- Sliced Bananas: Top with banana slices for sweetness and creaminess that complements the cherries.
Nuts and Seeds
- Chopped Almonds: Sprinkle chopped almonds on top for a crunchy texture and healthy fats.
- Pumpkin Seeds: Add pumpkin seeds for a boost of protein and a delightful crunch.
Sweeteners
- Extra Maple Syrup: Drizzle more maple syrup if you prefer a sweeter taste.
- Agave Nectar: Use agave nectar as an alternative sweetener to enhance the flavor profile.
Coconut Flakes
- Unsweetened Coconut Flakes: Garnish with coconut flakes for a tropical twist and added texture.
How to Perfect Cherry Chia Pudding
To achieve the best cherry chia pudding, there are a few techniques to keep in mind that will enhance its flavor and texture.
- Use Frozen Cherries: Frozen cherries blend smoothly into the pudding, creating a rich consistency.
- Mix Well Before Refrigerating: Stir well after adding chia seeds to ensure they don’t clump together.
- Adjust Sweetness After Setting: Taste the pudding before serving; you can always add more maple syrup if needed.
- Let It Sit Overnight: Allowing it to chill overnight usually results in better thickening compared to just a few hours.
- Experiment with Milk Substitutes: Different kinds of dairy-free milk can change the flavor; try almond, oat, or coconut milk for variety.
- Add Flavor Enhancements: A pinch of cinnamon or vanilla extract can add depth to your cherry chia pudding.
Best Side Dishes for Cherry Chia Pudding
Pair your cherry chia pudding with complementary side dishes that enhance your meal’s overall experience. Here are some great options:
- Greek Yogurt: Creamy Greek yogurt adds protein and pairs well with fruit flavors.
- Granola: Crunchy granola offers texture and sweetness; choose one low in sugar for healthier options.
- Fruit Salad: A mix of seasonal fruits provides freshness and balances the richness of the pudding.
- Overnight Oats: Make some overnight oats as a hearty side that complements the lightness of the pudding.
- Nut Butter Toast: Whole grain toast topped with almond or peanut butter makes for a satisfying combo.
- Smoothie Bowl: A small smoothie bowl can serve as a refreshing side that enhances your breakfast experience.
Common Mistakes to Avoid
Chia pudding can be simple, but there are a few common mistakes to keep in mind while preparing your Cherry Chia Pudding.
- Bold measurement errors – Always measure your chia seeds and liquid accurately. Too much liquid can result in a runny pudding, while too little can make it too thick.
- Bold skipping the soaking time – Allow the pudding to sit long enough for the chia seeds to absorb the liquid. Skipping this step will lead to a less desirable texture.
- Bold using low-quality ingredients – Choose fresh or frozen cherries and high-quality dairy-free milk. Poor ingredients can affect flavor and overall enjoyment.
- Bold not adjusting sweetness – Taste your mixture before refrigerating and adjust sweetness as needed. Each person’s preference varies, so don’t hesitate to add more maple syrup if desired.
- Bold forgetting to stir – After adding chia seeds, give your mixture a good stir. This helps prevent clumping and ensures even distribution of the seeds.
Storage & Reheating Instructions
Refrigerator Storage
- Store in an airtight container for up to 5 days.
- Keep it refrigerated to maintain freshness.
Freezing Cherry Chia Pudding
- Freeze for up to 3 months in a freezer-safe container.
- Allow it to cool completely before freezing.
Reheating Cherry Chia Pudding
- Oven – Transfer the pudding to an oven-safe dish and warm at 350°F (175°C) for about 10 minutes.
- Microwave – Heat in short bursts of 20-30 seconds, stirring in between until warmed through.
- Stovetop – Place in a saucepan over low heat, stirring gently until warmed.
Frequently Asked Questions
Here are some common questions regarding Cherry Chia Pudding that may help you prepare this delightful dish.
Can I use fresh cherries instead of frozen?
Yes, you can use fresh cherries! Just pit and chop them before blending.
How do I customize my Cherry Chia Pudding?
You can add toppings like nuts, seeds, or granola. Swapping out almond extract for vanilla is also a great option!
Is this recipe gluten-free?
Yes, Cherry Chia Pudding is gluten-free as all ingredients used are naturally free from gluten.
What is the best way to sweeten my pudding?
Maple syrup works well, but feel free to try agave nectar or honey for different flavors.
Final Thoughts
This Cherry Chia Pudding recipe is not only healthy but also versatile. You can customize it with various toppings or flavorings based on your preferences. It makes a perfect breakfast or snack option that’s both delicious and nutritious—give it a try today!

Cherry Chia Pudding
- Total Time: 7 minute
- Yield: Serves 2
Description
Start your day with a burst of flavor and nourishment with our Cherry Chia Pudding! This creamy, vegan delight combines the natural sweetness of cherries with the health benefits of chia seeds, making it an ideal choice for breakfast or a refreshing snack.
Ingredients
- 1/2 cup frozen cherries
- 1/2 cup dairy-free milk
- 2 teaspoons maple syrup (or to taste)
- 3 tablespoons whole chia seeds
- Optional: almond extract (for added flavor)
Instructions
- Blend frozen cherries, dairy-free milk, maple syrup, and optional almond extract until smooth.
- Pour the cherry mixture into a jar or container and stir in the chia seeds until well combined.
- Let the mixture sit for about 10 minutes to allow chia seeds to absorb some liquid.
- Cover and refrigerate overnight to achieve a thick consistency.
- Before serving, give it a good stir and add extra maple syrup if desired. Top with fruits or nuts as you like!
- Prep Time: 10 minutes
- Cook Time: No cooking required
- Category: Dessert
- Method: No cooking involved
- Cuisine: Vegan
Nutrition
- Serving Size: 1/2 cup (120g)
- Calories: 180
- Sugar: 7g
- Sodium: 60mg
- Fat: 6g
- Saturated Fat: 0.5g
- Unsaturated Fat: 5g
- Trans Fat: 0g
- Carbohydrates: 30g
- Fiber: 10g
- Protein: 4g
- Cholesterol: 0mg
Keywords: For a creamier texture, try different dairy-free milks like almond or coconut milk. Experiment with toppings such as fresh berries, sliced bananas, or shredded coconut for added flavor and texture.