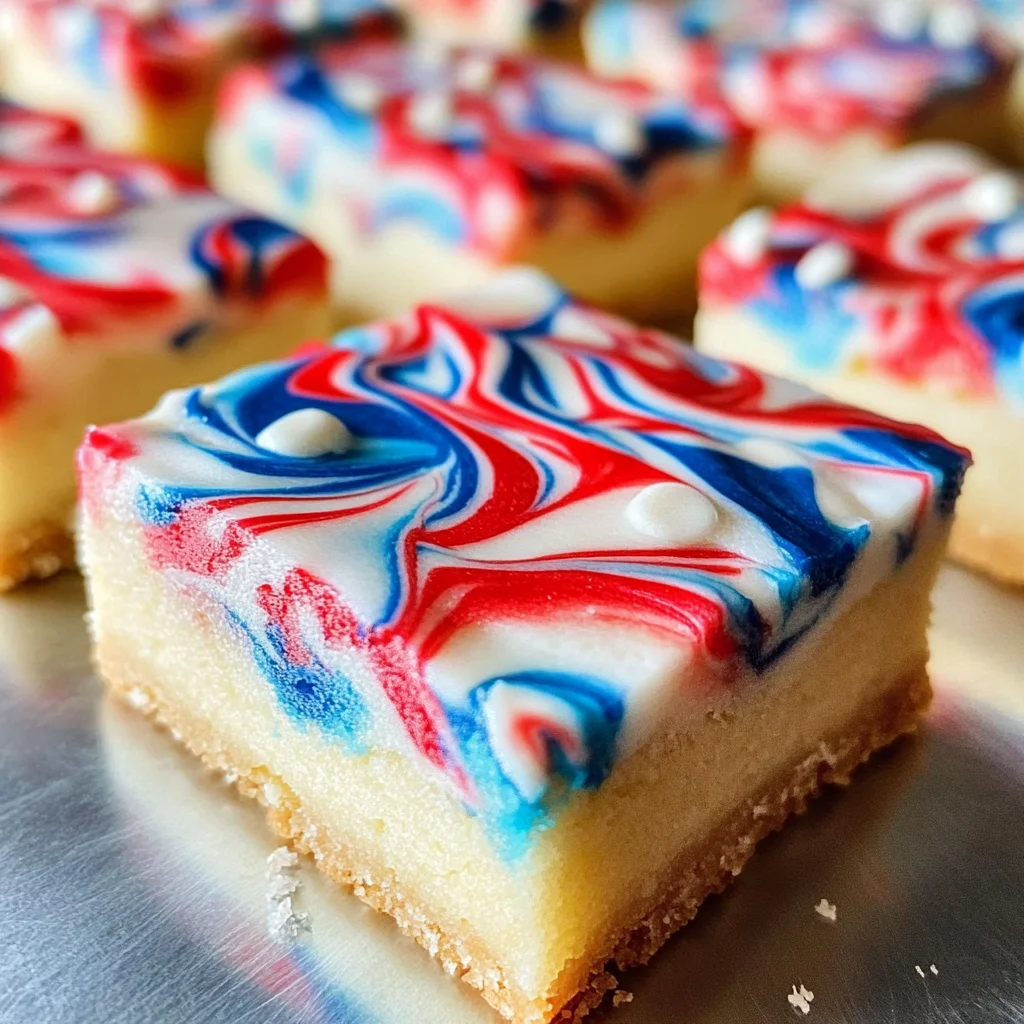
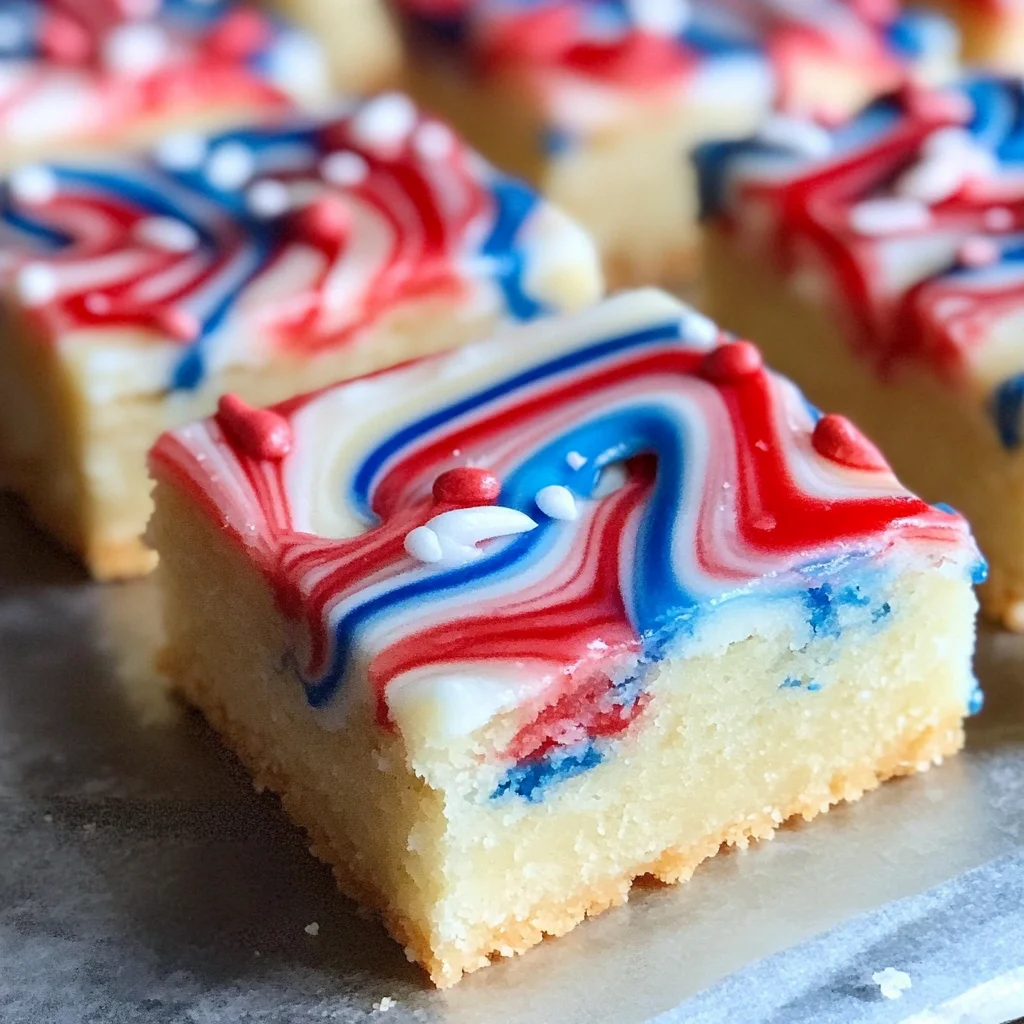
Fun Patriotic Cookie Bars are a delightful way to show your love for your country while satisfying your sweet tooth. These easy-to-make cookie bars feature vibrant swirls of red, white, and blue icing, making them perfect for celebrations like the 4th of July or Memorial Day. With a simple sugar cookie base and a fun decorating process, these bars are not just tasty but also visually appealing. Let your patriotic colors shine and impress guests at your next gathering!
Why You’ll Love This Recipe
- Easy to Make: This recipe simplifies cookie baking with an easy-to-follow bar format.
- Festive Appearance: The vibrant red, white, and blue icing makes these bars visually stunning for any celebration.
- Versatile Treat: Perfect for holidays or any day you want to feel festive!
- Delicious Flavor: Sweet sugar cookie base paired with smooth icing creates a delightful dessert experience.
- Great for Sharing: Easy to cut into squares, making them perfect for parties or potlucks.
Tools and Preparation
Gathering the right tools will make preparing these Patriotic Cookie Bars easier and more enjoyable. Here’s what you’ll need:
Essential Tools and Equipment
- Mixing bowl
- Electric mixer or whisk
- 9×13 baking pan
- Parchment paper (optional)
- Spatula
- Measuring cups and spoons
Importance of Each Tool
- Mixing bowl: Essential for combining ingredients smoothly without spills.
- Electric mixer or whisk: Helps achieve a well-mixed dough quickly, saving time and effort.
- Baking pan: A sturdy 9×13 pan ensures even baking and easy slicing of the cookie bars.

Ingredients
To create these delightful Patriotic Cookie Bars, gather the following ingredients:
For the Cookie Base
- 1 cup sugar
- 1/2 cup softened butter
- 1 egg
- 1 tsp. vanilla
- 1/3 cup sour cream
- 1/2 tsp. salt
- 1/2 tsp. baking soda
- 2 cups flour
For the Icing
- 1/2 cup powdered sugar
- 1 TBSP softened butter
- 2 TBSP milk
- 3 cups powdered sugar
- 5 TBSP milk
- 2 TBSP corn syrup
- 1 tsp almond extract
- red and blue food coloring
How to Make Patriotic Cookie Bars
Step 1: Preheat the Oven
Preheat your oven to 375 degrees F.
Step 2: Prepare the Cookie Dough
- Cream together the sugar and softened butter in a mixing bowl until light and fluffy.
- Add in the egg, sour cream, and vanilla extract; mix until well combined.
- Gradually add in the flour, baking soda, and salt. Beat until smooth.
Step 3: Bake the Cookie Base
- Transfer the dough into a 9×13 pan that has been sprayed with non-stick spray.
- Spread the dough evenly across the pan using a spatula.
- Bake in the preheated oven for about 15 minutes or until golden brown. Allow cooling completely before frosting.
Step 4: Prepare Vanilla Icing
Whisk together powdered sugar, softened butter, and milk until smooth. Spread a thin layer over the cooled cookie base to create a smooth surface for decorating.
Step 5: Create Colored Icing
Whisk together additional royal icing ingredients until smooth. Separate about 3 tablespoons into two bowls:
* Add red food coloring to one bowl.
* Add blue food coloring to another bowl.
Transfer each colored icing into separate baggies for piping.
Step 6: Decorate Your Cookie Bars
Pour white icing onto the cooled cookie bars and spread evenly. Use the colored icings to pipe lines down the length of the bars. Take a thin knife to swirl them gently to create beautiful patterns without blending into purple.
Step 7: Cool & Serve
Let your decorated Patriotic Cookie Bars cool completely before cutting them into squares. Enjoy this festive treat at your next celebration!
How to Serve Patriotic Cookie Bars
Patriotic Cookie Bars are a delightful treat perfect for festive gatherings. They can be served in various ways to enhance their visual appeal and flavor.
Creative Plating Ideas
- On a Festive Platter: Arrange cookie bars on a colorful platter with additional decorations like edible stars or sprinkles to highlight the holiday theme.
- With Fresh Fruit: Serve alongside fresh strawberries and blueberries for a refreshing contrast that complements the flavors of the cookie bars.
- As Desserts in Jars: Layer cookie bar pieces in small mason jars with whipped cream and fruit for an eye-catching dessert presentation.
Dipping Sauces
- Chocolate Sauce: Drizzle warm chocolate sauce over the top for a rich addition that pairs well with the sweetness of the bars.
- Berry Compote: Offer a homemade berry compote as a dip, adding a tangy flavor that balances the sweetness of the cookie bars.
How to Perfect Patriotic Cookie Bars
To achieve the best results with your Patriotic Cookie Bars, consider these essential tips.
- Bold Flavoring: Use high-quality vanilla extract to enhance the flavor profile of your cookie bars.
- Chill Dough: After mixing, chill the dough for about 30 minutes before spreading it into the pan. This helps prevent spreading during baking.
- Avoid Overmixing: Mix until just combined to keep your cookie bars soft; overmixing can lead to tough texture.
- Proper Cooling: Allow cookie bars to cool completely before frosting. This prevents melting and ensures neat icing application.
Best Side Dishes for Patriotic Cookie Bars
Pairing side dishes with your Patriotic Cookie Bars can elevate your celebration. Here are some delicious options to consider.
- Fruit Salad: A colorful mix of seasonal fruits adds freshness and balance to the sweetness of the cookie bars.
- Veggie Platter: A crunchy assortment of vegetables with a yogurt-based dip provides a healthy contrast to dessert.
- Ice Cream: Serve with vanilla or berry-flavored ice cream for an indulgent treat that complements the festive colors of your cookies.
- Cheese Board: A selection of cheeses, nuts, and dried fruits can create an appealing contrast while keeping guests satisfied.
- Pasta Salad: A light pasta salad featuring fresh herbs and veggies offers a hearty option that is still light enough not to overpower dessert.
- Lemonade or Iced Tea: Refreshing beverages like homemade lemonade or iced tea provide quenching options that enhance your summer gathering experience.
Common Mistakes to Avoid
Creating Patriotic Cookie Bars can be fun, but it’s easy to make mistakes. Here are some common pitfalls and how to prevent them.
- Boldly skip chilling the dough: Not chilling the dough can lead to overly flat cookie bars. Make sure to refrigerate the dough for at least 30 minutes before baking to maintain shape.
- Boldly forget to preheat the oven: Baking in an unpreheated oven can result in uneven baking. Always preheat your oven to 375 degrees F before putting your cookie bars in.
- Boldly overlook measuring ingredients: Inaccurate measurements can ruin your recipe. Use proper measuring cups and spoons for accuracy, especially for flour and sugar.
- Boldly ignore cooling time: Cutting the bars too soon can lead to a crumbly mess. Allow them to cool completely before frosting and cutting into squares.
- Boldly over-swirling icing: Swirling too much can create unwanted colors like purple. Be gentle and swirl just enough for a beautiful marbled effect.
Storage & Reheating Instructions
Refrigerator Storage
- Store the cookie bars in an airtight container.
- They will stay fresh in the refrigerator for up to one week.
Freezing Patriotic Cookie Bars
- Wrap individual bars in plastic wrap or aluminum foil.
- Place them in a freezer-safe container or bag. They can be frozen for up to three months.
Reheating Patriotic Cookie Bars
- Oven: Preheat the oven to 350 degrees F, place bars on a baking sheet, and warm for about 5-7 minutes.
- Microwave: Heat each bar for 10-15 seconds on a microwave-safe plate until warm.
- Stovetop: Place a bar in a non-stick skillet over low heat, cover with a lid, and warm for about 2-3 minutes.
Frequently Asked Questions
If you’re curious about making Patriotic Cookie Bars, here are some common questions answered.
How do I make Patriotic Cookie Bars gluten-free?
You can substitute regular flour with a gluten-free all-purpose blend. Ensure it contains xanthan gum for better texture.
Can I use different colors for icing on Patriotic Cookie Bars?
Absolutely! Feel free to customize with any food coloring that fits your theme or occasion.
What other occasions are suitable for Patriotic Cookie Bars?
These festive bars are great for birthdays, summer picnics, or any event where you want to celebrate with fun colors!
How do I store leftover Patriotic Cookie Bars?
Store leftovers in an airtight container in the refrigerator for up to one week, or freeze them for longer storage.
Can I add toppings to my Patriotic Cookie Bars?
Yes! Consider adding sprinkles or crushed candies on top of the icing before it sets for extra flair!
Final Thoughts
These Patriotic Cookie Bars are not only easy to make but also perfect for any festive occasion. They brighten up gatherings with their vibrant colors and delicious taste. Don’t hesitate to customize them further by adding your favorite toppings or flavors! Try this recipe today and enjoy a treat that celebrates fun and patriotism!
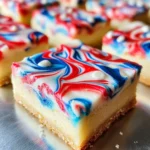
Patriotic Cookie Bars
- Total Time: 35 minutes
- Yield: About 12 servings 1x
Description
Create a vibrant and festive atmosphere with these Patriotic Cookie Bars, perfect for celebrating national holidays like the 4th of July or Memorial Day. These delightful cookie bars feature a sweet sugar cookie base adorned with colorful red, white, and blue icing that is as delicious as it is visually striking. Easy to make and even easier to share, they are sure to impress your guests at any gathering. With their fun decorating process and scrumptious flavor, these cookie bars are a must-try!
Ingredients
- 1 cup sugar
- 1/2 cup softened butter
- 1 egg
- 1 tsp. vanilla
- 1/3 cup sour cream
- 1/2 tsp. salt
- 1/2 tsp. baking soda
- 2 cups flour
- 1/2 cup powdered sugar
- 1 TBSP softened butter
- 2 TBSP milk
- 3 cups powdered sugar
- 5 TBSP milk
- 2 TBSP corn syrup
- red and blue food coloring
Instructions
- Preheat the oven to 375°F.
- In a mixing bowl, cream together sugar and softened butter until light and fluffy. Add the egg, sour cream, and vanilla, mixing well.
- Gradually incorporate flour, baking soda, and salt until the dough is smooth.
- Spread the dough into a greased 9×13 pan and bake for approximately 15 minutes or until golden brown. Allow cooling completely.
- Prepare vanilla icing by whisking powdered sugar, softened butter, and milk until smooth. Spread on cooled cookie base.
- Create colored icing using additional powdered sugar and milk; divide for red and blue food coloring.
- Decorate by piping colored icings over white icing and swirl gently with a knife.
- Let cool completely before cutting into squares.
- Prep Time: 20 minutes
- Cook Time: 15 minutes
- Category: Dessert
- Method: Baking
- Cuisine: American
Nutrition
- Serving Size: 1 square (45g)
- Calories: 180
- Sugar: 18g
- Sodium: 80mg
- Fat: 7g
- Saturated Fat: 4g
- Unsaturated Fat: 2g
- Trans Fat: 0g
- Carbohydrates: 27g
- Fiber: 0g
- Protein: 2g
- Cholesterol: 20mg
Keywords: For an extra touch, consider adding sprinkles or edible decorations on top of the icing before it sets. You can substitute gluten-free flour for standard flour if needed.