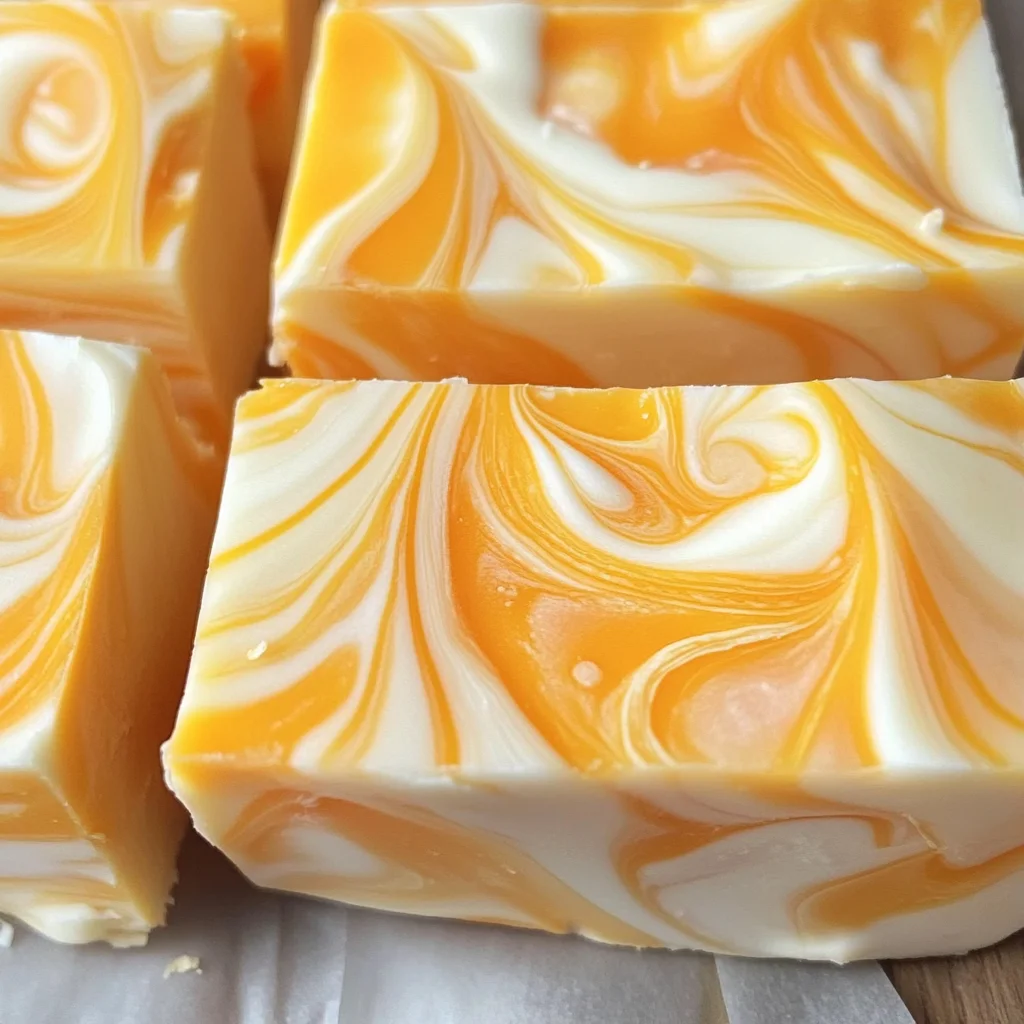
Indulge in the delightful sweetness of Orange Dreamsicle Fudge. This treat perfectly balances the creamy richness of white chocolate with the vibrant citrus notes of orange. Ideal for celebrations or a cozy night in, this fudge offers a unique twist that will enchant your taste buds. Each bite delivers a nostalgic flavor reminiscent of summer days, making it a must-try for dessert lovers!
Why You’ll Love This Recipe
- Easy to Make: This recipe comes together quickly with straightforward steps, perfect even for beginners.
- Rich Flavor Profile: The combination of white chocolate and orange creates a decadent taste that is both familiar and exciting.
- Versatile Treat: Great for parties, holidays, or just as an everyday indulgence—this fudge fits any occasion.
- Appealing Presentation: The marbled effect not only tastes good but looks stunning on any dessert table.
- Crowd-Pleaser: Loved by both kids and adults alike, it’s sure to impress everyone who tries it.
Tools and Preparation
To create your Orange Dreamsicle Fudge, having the right tools makes all the difference. Gather your essentials before you begin to ensure a smooth process.
Essential Tools and Equipment
- Baking pan (9×13 inches)
- Parchment paper
- Saucepan
- Butter knife
- Mixing bowl
- Candy thermometer
Importance of Each Tool
- Baking pan: Provides the perfect shape for your fudge, allowing it to set evenly.
- Parchment paper: Ensures easy removal of the fudge after it sets, preventing sticking.
- Saucepan: Ideal for melting ingredients together smoothly without burning.
- Candy thermometer: Helps monitor the temperature accurately to achieve the perfect fudge consistency.

Ingredients
For the Fudge Base
- 2/3 c. heavy cream
- 3 c. granulated sugar
- 3/4 c. unsalted butter
- 7 oz. vegan marshmallows cream
For Flavoring
- 2 c. white chocolate chips
- 3 teaspoons orange extract
- Orange food coloring (up to 10 drops, based on preference)
How to Make Orange Dreamsicle Fudge
Step 1: Prepare Your Pan
Start by greasing a baking pan that measures 9×13 inches. Line it with parchment paper, ensuring all sides are covered for easy removal later.
Step 2: Combine Ingredients
In a saucepan, combine unsalted butter, heavy cream, and granulated sugar. Stir until the butter melts completely and everything blends well.
Step 3: Cook Mixture
Continue cooking the mixture over medium heat until it reaches 235°F (softball stage). Stir continuously for about 3 minutes once this temperature is reached.
Step 4: Add Marshmallows and Chocolate
Remove from heat. Quickly stir in vegan marshmallows cream. Then add in white chocolate chips, mixing until smooth and creamy.
Step 5: Color Your Fudge
Transfer about 1 cup of this mixture into a separate bowl. To the remaining mixture in the saucepan, add orange extract and up to 10 drops of orange food coloring. Mix thoroughly until you achieve your desired color.
Step 6: Pour Mixture into Pan
Pour the colored mixture evenly into the prepared baking pan.
Step 7: Swirl Mixtures Together
Drop dollops of the plain mixture on top of the colored one. Use a butter knife to swirl them together creating an appealing marble effect.
Step 8: Set in Refrigerator
Place the pan in the refrigerator for about 2 hours until the fudge sets properly.
Step 9: Cut and Serve
Once set, cut into squares. Enjoy this delightful combination of flavors and textures!
How to Serve Orange Dreamsicle Fudge
Orange Dreamsicle Fudge is a delightful treat that brings vibrant flavors to any occasion. Here are some creative ways to serve this sweet confection and enhance the experience.
For Family Gatherings
- Slice and Share: Cut the fudge into bite-sized squares and serve on a decorative platter for easy sharing.
- With Fresh Fruit: Pair fudge with slices of fresh oranges or berries for a refreshing contrast.
For Celebratory Events
- Party Favors: Wrap individual pieces in colorful cellophane bags tied with ribbon for a fun take-home treat.
- Dessert Table Feature: Display the fudge as part of a dessert table, surrounded by complementary desserts like cupcakes or cookies.
For Cozy Nights In
- Hot Beverage Pairing: Enjoy with a warm mug of hot chocolate or herbal tea for a comforting evening treat.
- Movie Night Snack: Serve alongside popcorn for a sweet-savory movie night experience.
How to Perfect Orange Dreamsicle Fudge
Creating the perfect Orange Dreamsicle Fudge requires attention to detail. Here are some tips to ensure your fudge turns out just right.
- Use Fresh Ingredients: Always opt for fresh orange extract and high-quality white chocolate chips to maximize flavor.
- Temperature Control: Ensure you reach the softball stage (235°F) to achieve the right texture; use a candy thermometer for accuracy.
- Stir Gently but Thoroughly: When mixing in ingredients, stir gently but make sure everything is well combined to avoid lumps.
- Cool Gradually: Allow the fudge to cool at room temperature before refrigerating; this helps maintain its creamy texture.
- Store Properly: Keep the fudge in an airtight container at room temperature or in the fridge for longer freshness.
Best Side Dishes for Orange Dreamsicle Fudge
To create a delightful dessert spread, consider these side dishes that complement the flavors of Orange Dreamsicle Fudge beautifully.
- Coconut Macaroons: Chewy and sweet, these offer a tropical flair that pairs well with citrus flavors.
- Lemon Bars: Tangy and refreshing, lemon bars provide a zesty contrast to the sweetness of the fudge.
- Fruit Salad: A mix of seasonal fruits adds freshness and balances the richness of the fudge.
- Cheesecake Bites: Creamy cheesecake bites can add an indulgent touch alongside your fudge.
- Chocolate-Dipped Strawberries: The combination of chocolate and fruit complements the orange flavor perfectly.
- Vanilla Ice Cream: A scoop of vanilla ice cream enhances the creamy texture and provides a cool contrast to the fudge.
Common Mistakes to Avoid
Avoiding common mistakes can elevate your Orange Dreamsicle Fudge from good to great. Here are some pitfalls to watch out for:
- Bold Phrase: Skipping the thermometer. Always use a candy thermometer to achieve the perfect softball stage at 235°F.
- Bold Phrase: Not greasing the pan properly. Ensure you grease and line the baking pan well so the fudge releases easily.
- Bold Phrase: Overheating the mixture. Stir continuously until it reaches temperature but avoid boiling, which can alter texture.
- Bold Phrase: Not swirling enough. When combining mixtures, swirl gently but thoroughly to create that beautiful marbled effect.
- Bold Phrase: Cutting too soon. Allowing the fudge to set in the refrigerator for a full 2 hours is essential for achieving the right firmness.

Storage & Reheating Instructions
Refrigerator Storage
- Store in an airtight container for up to 1 week.
- Layer parchment paper between pieces to prevent sticking.
Freezing Orange Dreamsicle Fudge
- Wrap tightly in plastic wrap and then in aluminum foil.
- Freeze for up to 3 months for best quality.
Reheating Orange Dreamsicle Fudge
- Oven: Preheat to 300°F and warm fudge on a baking sheet for about 5-10 minutes.
- Microwave: Heat in 15-second intervals until just softened; do not overheat.
- Stovetop: Use a double boiler on low heat, stirring frequently until warmed through.
Frequently Asked Questions
Here are some common questions about making Orange Dreamsicle Fudge:
Can I use different flavors in this fudge?
You can absolutely experiment with other extracts like lemon or lime instead of orange, allowing for unique flavor combinations.
What’s the best way to cut my Orange Dreamsicle Fudge?
Use a sharp knife, warmed under hot water for clean cuts. This prevents crumbling and helps maintain neat edges.
How long does it take for Orange Dreamsicle Fudge to set?
The fudge typically needs about 2 hours in the refrigerator to set properly before cutting into squares.
Can I add nuts or other mix-ins?
Yes! Feel free to fold in nuts or dried fruits after melting your fudge mixture for added texture and flavor.
How should I store leftover fudge?
Keep any leftover fudge in an airtight container in the fridge for up to a week, or freeze it for longer storage.
Final Thoughts
Orange Dreamsicle Fudge is not just a treat; it’s a delightful experience that brings joy with every bite. This recipe allows room for creativity—feel free to customize flavors or toppings based on your preferences. Whether enjoyed at gatherings or as an everyday snack, this fudge promises satisfaction every time you indulge!
Orange Dreamsicle Fudge
- Total Time: 25 minutes
- Yield: Approximately 24 servings 1x
Description
Indulge in the delightful experience of Orange Dreamsicle Fudge, a creamy confection that perfectly combines the sweetness of white chocolate with zesty orange flavor. This easy-to-make treat is a nostalgic nod to summer days, making it perfect for any occasion—be it festive gatherings or cozy evenings at home. With its vibrant colors and rich flavors, this fudge provides a stunning presentation that will impress both kids and adults alike. Each bite is a harmonious blend of creamy and citrusy goodness, making it an irresistible dessert option you won’t want to miss.
Ingredients
- 2/3 cup heavy cream
- 3 cups granulated sugar
- 3/4 cup unsalted butter
- 7 oz vegan marshmallow cream
- 2 cups white chocolate chips
- 3 teaspoons orange extract
- Orange food coloring (optional)
Instructions
- Grease a 9×13 inch baking pan and line it with parchment paper.
- In a saucepan, combine unsalted butter, heavy cream, and granulated sugar. Stir until melted.
- Cook over medium heat until the mixture reaches 235°F (softball stage), stirring continuously for about 3 minutes.
- Remove from heat and stir in vegan marshmallow cream followed by white chocolate chips until smooth.
- Transfer about 1 cup of the mixture to another bowl. Add orange extract and food coloring to the remaining mixture; mix well.
- Pour the colored mixture into the prepared pan and drop dollops of the plain mixture on top. Swirl gently with a knife.
- Refrigerate for approximately 2 hours until set, then cut into squares and serve.
- Prep Time: 15 minutes
- Cook Time: 10 minutes
- Category: Dessert
- Method: Baking
- Cuisine: American
Nutrition
- Serving Size: 1 square (approximately 40g)
- Calories: 160
- Sugar: 23g
- Sodium: 30mg
- Fat: 7g
- Saturated Fat: 4g
- Unsaturated Fat: 2g
- Trans Fat: 0g
- Carbohydrates: 23g
- Fiber: 0g
- Protein: <1g
- Cholesterol: 15mg
Keywords: Use high-quality ingredients for the best flavor. Feel free to experiment with different extracts or add-ins like nuts or dried fruits for added texture.